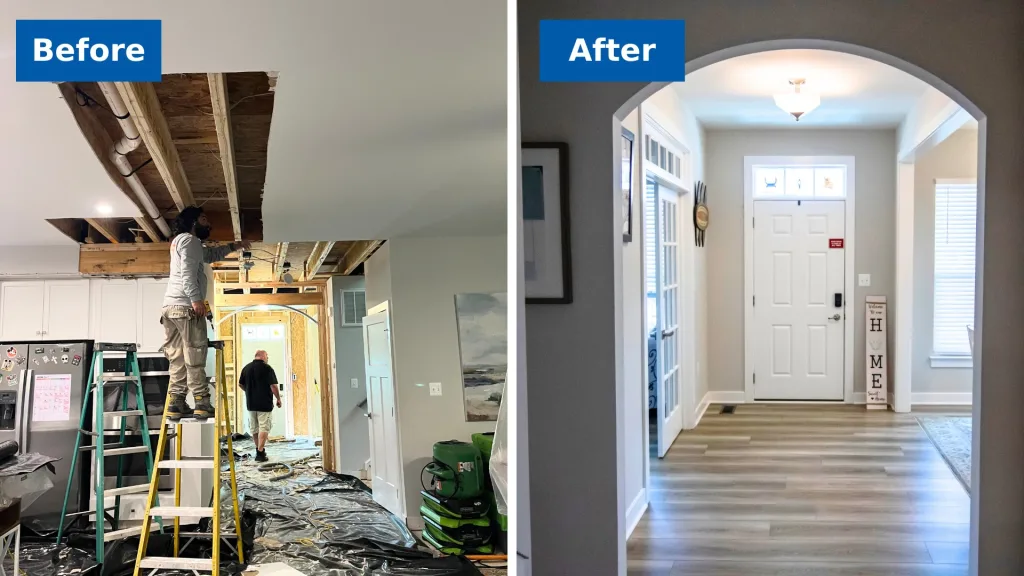
Necessary Steps to Adhere To for Efficient Water Damage Reconstruction in your house
When confronted with water damages in your home, knowing the essential actions for efficient remediation can make all the difference. You need to assess the damages and assurance security prior to taking on the issue. Stopping the resource of water is crucial, yet it's just the beginning. As soon as you have actually managed that, there's a series of activities you should require to secure your home from more issues. Let's explore what you need to do following.
Examine the Damages
The first step is to evaluate the damages extensively when you discover water damage in your home. Start by recognizing the source of the water invasion. Examine for leaks, ruptured pipes, or other concerns causing the issue. Next off, analyze the impacted locations for visible indicators of damage, including staining, bending, or mold and mildew development. Don't neglect to search in surprise areas like behind wall surfaces or under flooring, as water can seep into these areas unnoticed.Document the damage by taking clear photos and notes. When going over the circumstance with your insurance policy provider or restoration professionals, this will aid you. Take notice of the kind of products influenced, as various products need various repair approaches. Examine the extent of the damage. Is it considerable or minor? Understanding the range will certainly direct you in making a decision whether to manage it yourself or call the specialists for a more comprehensive reconstruction procedure.

Guarantee Security
Before you begin any kind of remediation job, guaranteeing your safety is necessary. First, evaluate the condition of your home. If the water's deep or if you observe electric hazards, do not enter the location. Turn off the electrical energy and gas supply to avoid crashes. Use protective equipment like handwear covers, masks, and boots to protect on your own from contaminants or mold.It's crucial to stay aware of your surroundings; expect slippery surfaces and sharp things. Treat it as harmful waste if the water is from a sewage backup. Keep youngsters and pets far from affected areas to avoid exposure.Once you've taken these safety measures, you can wage the reconstruction procedure. Remember, your safety comes first, and if you're ever unclear, it's best to seek advice from a professional. Taking these steps will assist guarantee you prepare to deal with the repair safely and effectively.
Quit the Source of Water
After guaranteeing your safety and security, the following action is to quit the resource of water. Identify where the leakage is originating from. Maybe a ruptured pipe, a malfunctioning appliance, or even hefty rainwater going into through a harmed roof. Turn off the major water supply to your home to protect against further flooding if it's a pipes problem. For appliances, unplug them and turn off their water supply valves.If the resource is outside, like rainwater, attempt to divert it away from your home making use of sandbags or other obstacles. For small leakages, you could be able to make use of tape or a sealer temporarily up until a specialist can repair it. Bear in mind, addressing the source promptly is necessary to lessening damage and avoiding mold growth. Once you have actually quit the water, you'll be in a better position to go on to the next actions in the restoration process.
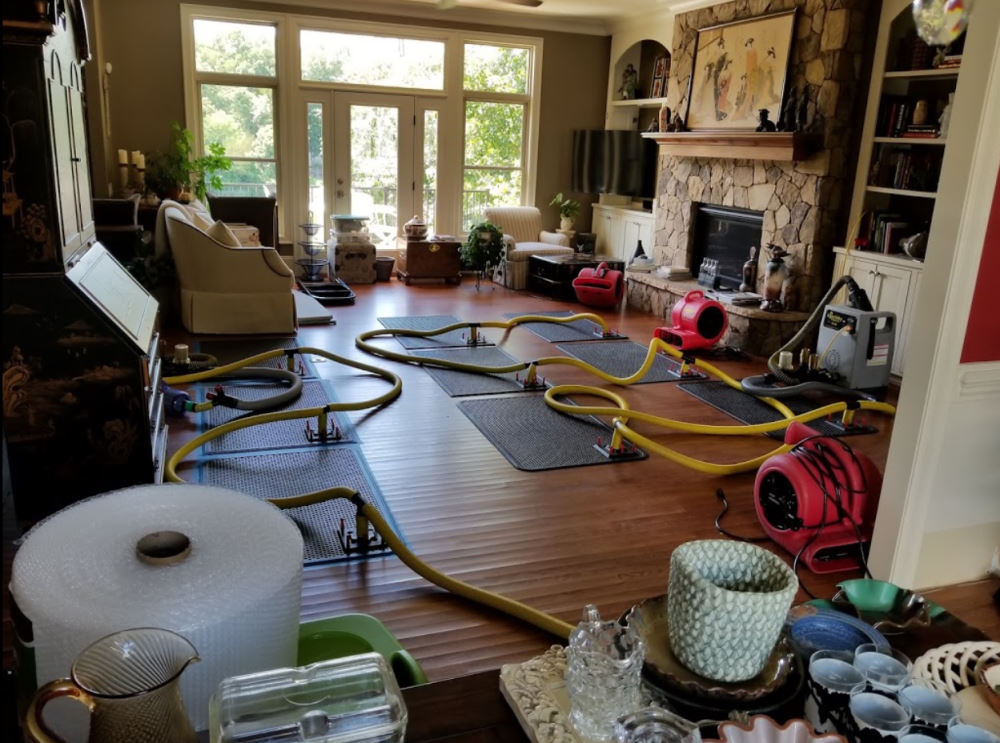
Remove Excess Water
Act promptly to get rid of excess water, as standing water can lead to a lot more comprehensive damage and mold and mildew development. Collect your devices: a wet/dry vacuum, pails, and towels. You can make use of towels to soak up the moisture if the water is shallow. For much deeper water, a wet/dry vacuum is your best option. See to it to empty the vacuum frequently to prevent overflow.If the water is contaminated, like from a sewer backup, put on safety equipment, consisting of handwear covers and masks, to keep on your own secure. As soon as you have actually gotten rid of as much water as possible, check for concealed pockets of dampness in corners and under furnishings, as these can nurture mold.Don' t forget to shut off electrical appliances and power outlets in damp areas to avoid dangers. This first step is important in minimizing damages and establishing the phase for a successful remediation procedure.
Dry and Dehumidify the Area
As soon as you have actually gotten rid of the excess water, it's vital to completely dry and evaporate the location thoroughly. Begin by using dehumidifiers properly to draw dampness out of the air and prevent mold growth. Keep an eye on humidity degrees to ensure the space dries out totally.
Remove Standing Water
To successfully tackle water damage, you need to concentrate on removing standing water as quickly as feasible. Beginning by gathering necessary devices, like a wet/dry vacuum or a pump, relying on the volume of water. A vacuum needs to do the technique if the water is superficial. For larger quantities, a pump is much more efficient. While working, see to it to use safety gear to maintain yourself safe from impurities. As you eliminate the water, take notice of hidden locations like under furnishings or in corners where water could gather. Once you go to these guys have actually eliminated the majority, your room will begin to dry. This step is important, as sticking around water can result in mold and mildew growth and much more extensive damage.
Use Dehumidifiers Successfully
Just how can you effectively utilize dehumidifiers to completely dry and dehumidify your area? Begin by putting your dehumidifier in the most afflicted location, preferably where water damages is most serious. Make certain to shut all home windows and doors to produce a closed environment. Turn on the dehumidifier and established it to the appropriate moisture degree, typically around 30-50%. Empty the water collection tank regularly, or take into consideration utilizing a version with a continual drain choice for comfort. If feasible, utilize fans to enhance air flow, aiding the dehumidifier work a lot more efficiently. Keep the dehumidifier running till you're confident that the location is extensively dried out, preventing mold development and additional damage (Flood Damage Restoration). This action is important for reliable water damage reconstruction
Monitor Moisture Degrees
Surveillance humidity levels is vital throughout the drying out procedure, as it assists guarantee your space continues to be totally free from excess moisture. Buy a reputable hygrometer to track moisture properly. Ideally, you want to maintain degrees in between 30% and 50%. If moisture analyses climb over this range, you may need to change your dehumidifiers or followers to enhance airflow. Inspect the readings consistently, especially in areas prone to moisture, like bathrooms or basements. If you see consistent high moisture, take into consideration boosting ventilation or making use of additional dehumidifiers. Remaining on top of these degrees not only speeds up the drying procedure however additionally stops mold and mildew growth, guaranteeing your home keeps safe and comfortable.
Tidy and Disinfect Affected Surfaces
Bring back and Repair Your Home
After cleansing and disinfecting the affected areas, it's look at this web-site time to bring back and fix your home. Begin by evaluating the damage. Check for structural issues, like deteriorated wall surfaces or floorings, and attend to any necessary repair work. Replacing harmed drywall or flooring is necessary for both aesthetics and safety.If your furniture or belongings were influenced, think about whether they can be recovered click here for info or require substitute. Tidy or professionally bring back things where possible.Next, paint walls and touch up any areas that need attention. This not only improves look yet also secures surface areas from future water damage.Don' t neglect to check your pipes and home appliances for leaks, making sure everything's working correctly. Think about setting up a dehumidifier to protect against future wetness problems. By taking these steps, you'll recover your home to its former glory and develop a safer living setting.
Frequently Asked Inquiries
The Length Of Time Does Water Damages Remediation Usually Take?
Water damages restoration usually takes anywhere from a couple of days to numerous weeks, relying on the extent of the damages (Water Damage Repair). You'll want to assess the situation promptly to lessen additional complications and guarantee correct reconstruction
Will My Insurance Coverage Cover Water Damage Remediation Prices?
Your insurance coverage could cover water damages repair costs, however it relies on your policy. Examine your coverage details and call your insurance agent to clarify what's consisted of and what you need to sue.
Can I Handle Water Damage Restoration Myself?
You can deal with water damage restoration on your own, however it's important to assess the situation. If it's extensive, you could wish to call experts. Constantly prioritize safety and assure you've obtained the right devices.
What Are the Signs of Hidden Water Damages?
You may notice indications of covert water damages like distorted walls, stuffy odors, or discoloration. If your floorings feel spongy or you place mold, it's time to investigate better before the scenario worsens.
Just How Can I Avoid Future Water Damages in My Home?
To stop future water damage in your house, you should regularly check pipes, seal fractures, maintain rain gutters, and guarantee correct drain. Installing a sump pump and wetness obstacles can also help maintain your room dry. When you uncover water damages in your home, the first action is to analyze the damages completely. Act promptly to remove excess water, as standing water can lead to a lot more extensive damage and mold and mildew development. To successfully take on water damages, you need to focus on eliminating standing water as swiftly as feasible. As you remove the water, pay attention to concealed locations like under furniture or in corners where water could accumulate. Water damages restoration usually takes anywhere from a couple of days to numerous weeks, depending on the level of the damages.
Comments on “Smoke Damage Restoration vs. DIY Cleaning: Which Is Right for You?”